Accessibility Requests
Accessibility is key to making online course content available for everyone. This is especially important to Techrangers, as part of our jobs includes occasionally resolving accessibility issues.
Techrangers will occasionally be assigned accessibility requests. Typically these requests will come from instructors who require assistance in identifying and/or correcting accessibility issues in their course content. Continue reading to learn how to handle these requests.
How to Complete The Request
Assign Yourself to The Ticket
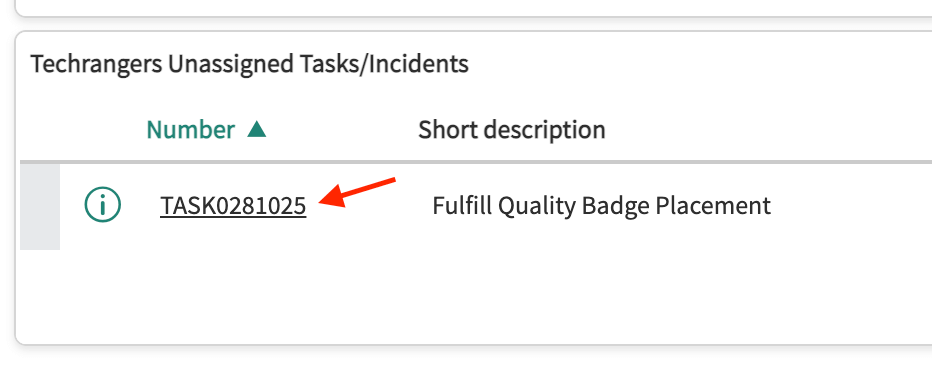
Click on the TASK number of the request you’d like to work on.
Then, type your name into the Assigned To box. You can also type your NID. Wait a moment for the search to complete, then click on your name in the search results. Then, click the Save button.
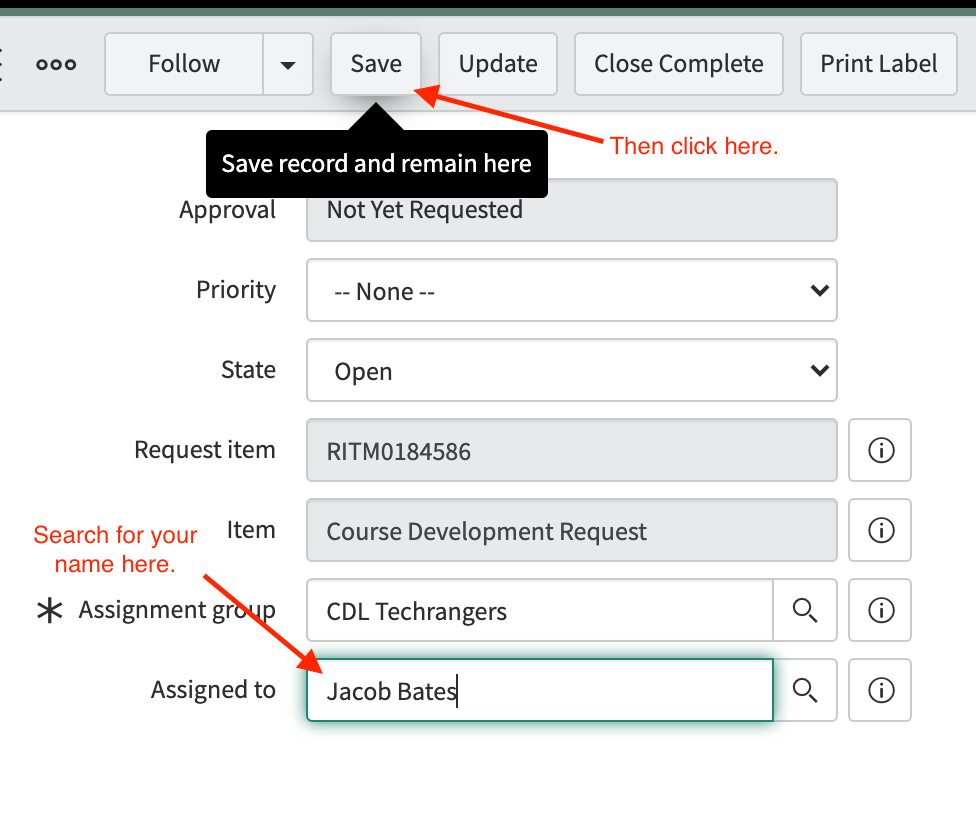
The request is now assigned to you!
Find The Course
Once assigned you can begin working on the ticket. First, read the ticket details. There it should tell you what course they want you to run and what extra steps they want you to do. Below is a picture showing where to find the course name in the ticket.
![]()
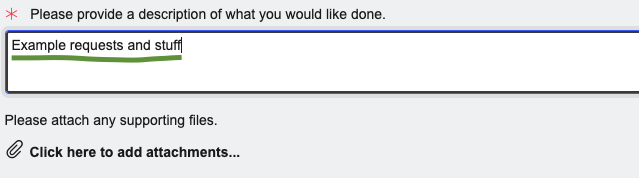
Also the image below that shows where you can find the additional comments left explaining the situation. It is important to read this to provide good work comments after you are done working on the ticket as well as make sure you are doing all the steps that are asked (sometimes they will mention something specific not covered in the guide that you will need to do in relation to the ticket).
Enroll In the Course
Using the course information head over to Soul Patch. Once there click on the enrollment manager and go through the steps to enroll yourself into the course. For more information about how to do this, check out the enrollments manager page that explains in more detail.
Creating a Backup of the Course
Before making any changes to a course, it’s very important to make a backup just in case you accidentally make any difficult-to-fix mistakes or deletions while making changes to the HTML.
Once you are in the course, you should see on the left hand side Home, Modules, Settings etc. Click on the “Settings” button. Once there on the right hand side it will say “Export Course Content”.
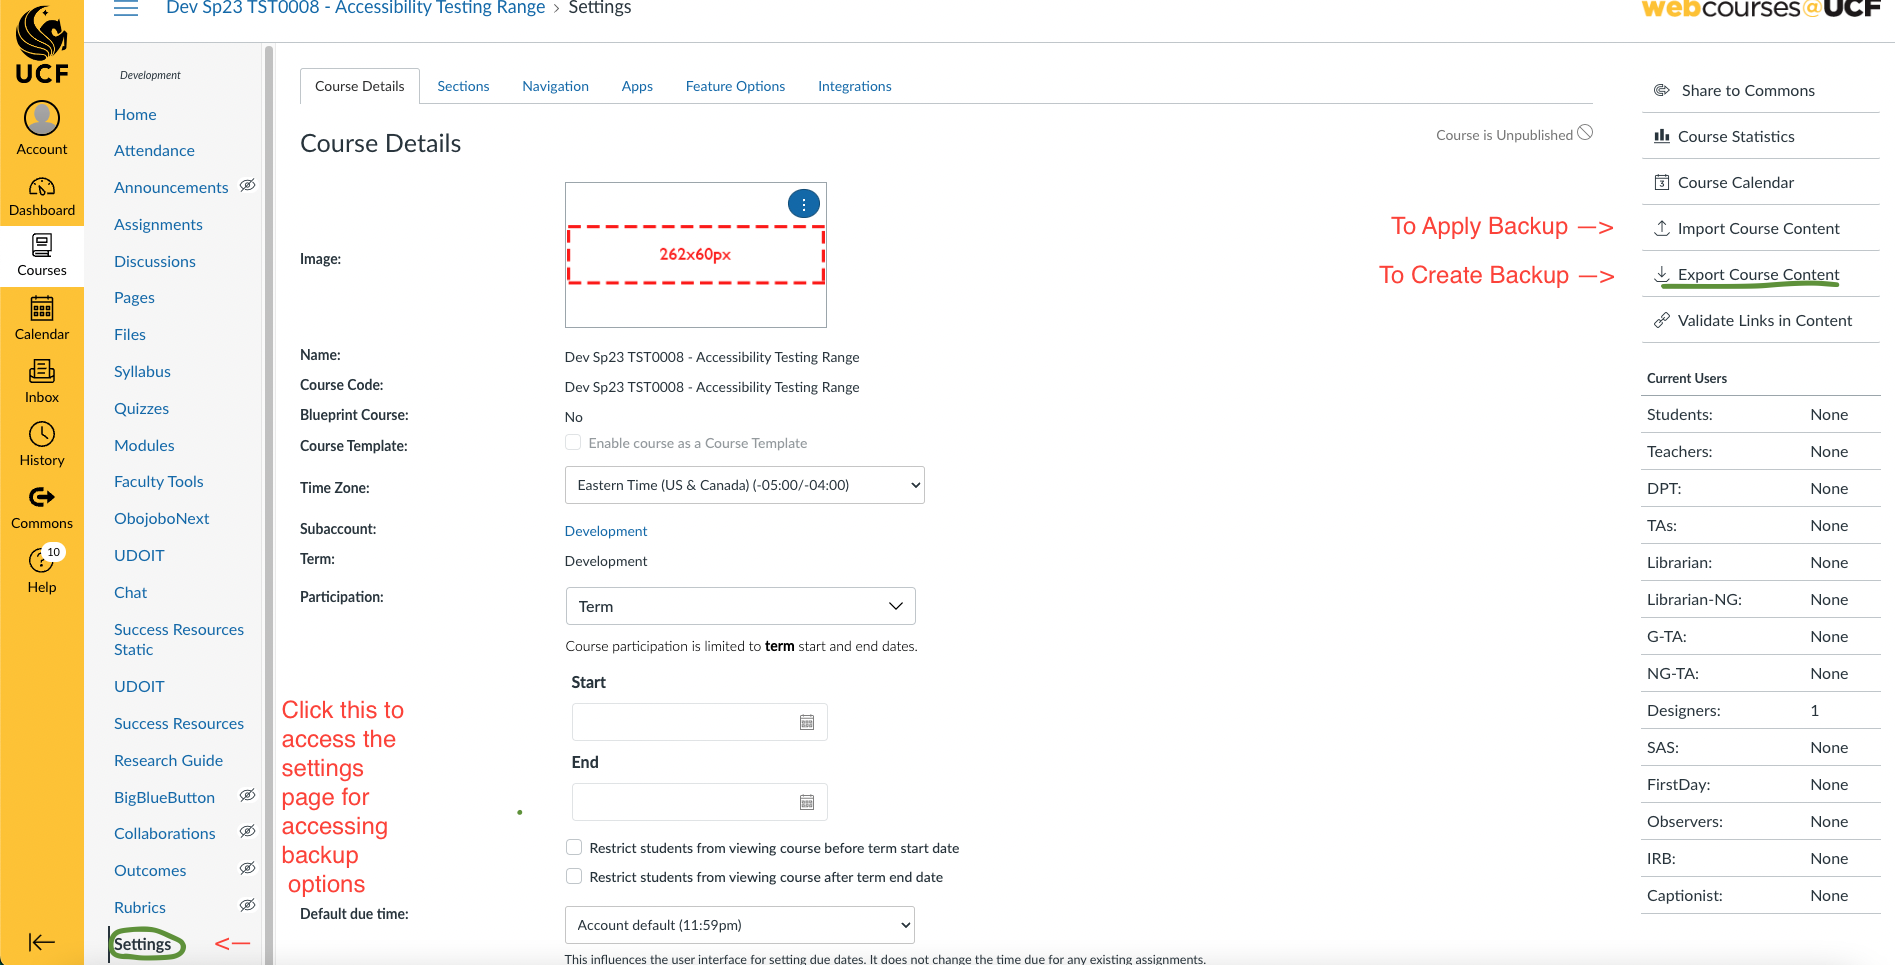
From there make sure that “Course” is selected in the radio button menu, and then click Create Export. This process may take a while, which is fine. Once it’s finished, make sure you download the backup before starting any work. To download the backup you just recreated go back to the Export Course Content from settings and there you will see a link named Course Export from x Amount of Time ago. That will be your backup you created and is a way to verify the backup worked (if it is not there then no backup created or backup expired).

In case something bad happens and you need to import the backup to undo the changes you made, go to the settings page and click “Import Course Content” this time. Select your backup from the dropdown menu, and follow the directions to upload and import content again.
Using UDOIT To Scan the Course
Also in the same area where you found the settings you should see a category called UDOIT. UDOIT is a tool used to scan all of the pages in a course and identify accessibility issues. Click on UDOIT and it should automatically begin scanning the course. Once it is finished (tells you via green check, or when you are able to click the tab UFIXIT) you can click the UFIXIT tab and it will pull up all the information from the scan to review and look over.
Understanding Output
When you arrive at the issues section of UDOIT you will be presented with a lot of information so we will dissect it. It will show in the top right hand area how many total errors it found, how many suggestions it has, how many issues that have been fixed, how many have been marked resolved, and how many files have been reviewed. The errors and suggestions are the ones we want to fix and look over. When an error is fixed it will be in the fixed category. Fixing only applies if you fix the issue via the UDOIT system, if you have to manually edit the HTML to fix it, then you can mark it as resolved. You can see all issues you fixed, marked resolved, etc. by filtering it out. The table below which is the main part of the system displays each issue, fixed issue, etc. It may be helpful to sort by issue (i.e. issue type) which you can do by clicking on Issue. You can also filter out issues, fixes, etc. by clicking on Filter Option. This is helpful to let you only focus on fixing the issues/suggestions and not see what you already fixed.
Now that we understand the layout of UDOIT, let us look into how to go about solving the issues. If an error has “Closed Captions Were Auto-Generated” as its issue type, then we can ignore these as this is covered by another department. That said, like mentioned in the section below about writing additional comments, you will want to leave a note to the client saying what type of request and ticket they can send in to have these issues resolved.
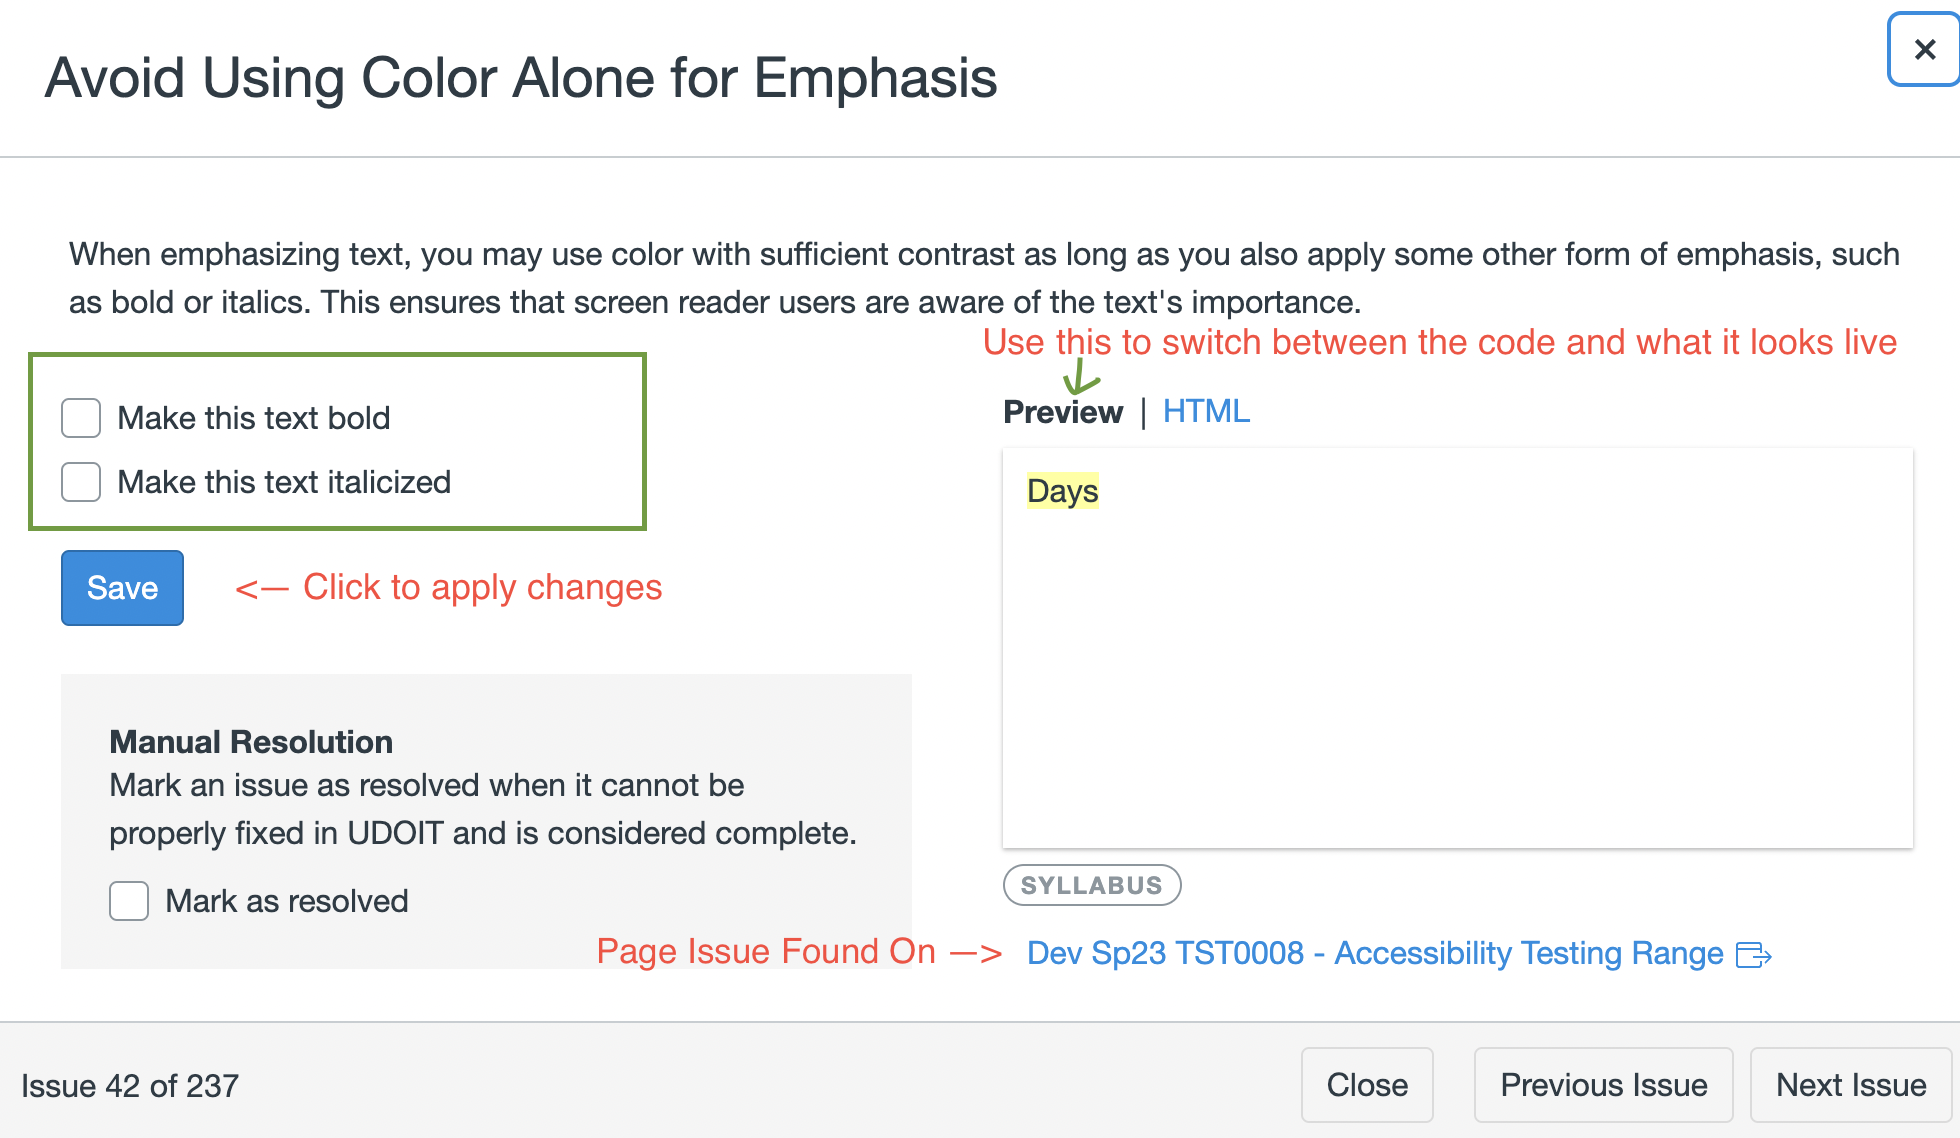
Otherwise we can click on the issue to read what it is about. There are a lot of issues (and suggestions) that UDOIT can detect so this guide will try to cover the general approach as to how to fix them. First, check to see if UDOIT allows you to fix whatever the problem is within itself. Like in the example below, you have a save button where if you click it, UDOIT will apply whatever changes you have to the page fixing the issue based on if you provided a bit to fix it, etc. To make changes to the content, look above the save button (i.e. the area in the green box in image below (content is different depending on the issue)). Sometimes this will update the preview or the code (the HTML and preview on right hand side let you switch between the two and is good for locating it on the page).
Another note is that to go to the page (if you need to make manual updates or just more context of what it is) you can click on the page title and it will open the page in a new tab.
Note: When fixing an issue or doing a suggestion it is important that you think critically. UDOIT may not offer the correct solution to auto fixing the issue, so check out the actual code and what will if changed before hand. Really the goal is to create the most accessible content so keep the accessibility training in mind. It is also important to just view the page that issue was on in case there are other accessibility issues that UDOIT may not have detected but by looking at the page you can see, maybe this should be changed etc. If you do solve it manually make sure to click “Mark as Resolved” (see below), since you could not use UDOIT auto-fix to fix issue fix issue.
So, if you can not fix a suggestion or issue automatically by UDOIT, or the UDOIT auto fix is not correct for how to fix the issue then you will have to manually go to the page and apply the fix (see the further note). When doing this it is important that you mark the issue or suggestion as “Marked as Resolved”. This just means you manually edited the code to fix the issue rather than having UDOIT apply the fix. An example of an issue that cannot be fixed automatically by UDOIT and needs to be Marked as Resolved when finished can be seen below.

Further note: When pressing the fix button or marking as resolved, sometimes if you have already edited and saved the page UDOIT may give you an error. If you want to avoid said error so you can mark the task as complete, before you manually edit or automatically fix the page click on Fix/Mark as Resolved. Just make sure you do not forget to go and apply the changes though.
Lastly, please try and document everything as you go through the request. The details you want to save will be explained in the section below, but you want to know what you do so that when you do write the additional comments you do not forget and can provide great detailed summaries of your progress and completion.
Writing Additional Comments
Once you complete and fix all the issues (minus the captioning) or run out of time for the day, it is important to leave comments for the client and Techrangers that work on the ticket next about what you have worked on and accomplished. Note that this is a guide on things you should include in the comments but how you write the notes and what you include ultimately falls on you and the specific details of the ticket sent.
Note: Make sure that when typing in the work notes box that it says it is additional comments not work notes. Work notes will only be visible to you and other Techrangers, but additional comments will be visible by the client, so please ensure that that option is enabled and sending the notes to both client and Techranger.
One thing to be sure to include is mentioning that if they want the captioning issues fixed, then they need to reach out and submit a Proactive Captioning Request on Service Now. This is because those are the proper channels to fix those issues and the responsibility of fixing captions is not a Techranger issue at the moment.
Another thing to include would be mentioning and summarizing which issues you did fix, mainly concerning ones that had to be fixed and changed content that is noticeably different. For example, color contrast fixes or updating a link to be descriptive rather than just the url might be important for the client/professor to know about so that they can review those changes and fix them if they do not like the appearance or style in terms of how they want the course presented.
One more thing to consider adding is if you ran into any difficulties or saw additional fixes not found on UDOIT that you fixed. Mainly, what things did you notice that it would be up to the professor to review and change. This might include noticing a lot of videos, so recommending to the professor to double check the subtitles, or perhaps something that while UDOIT did not catch it or did catch it, but it is also a bit more extreme of a change (ie not something outside the realm of the ticket). It is important to bring stuff like this and one example could be that UDOIT finds a page that is too long. This is something we as Techrangers cannot change as it would require us to cut and move content (outside scope of the ticket), but it is important the client is made aware so they can make those changes.
Finishing The Request
Once the notes have been posted, make sure to unassign yourself from the task after you have left notes and are done for the day. If all the issues from UDOIT besides captions that can be solved are finished, feel free to mark the task as closed complete.