Office Presence Spreadsheet
In addition to setting your schedule in Outlook, you also need to add your schedule to the Office Presence Spreadsheet, located in Teams. This document is used to determine which days and times you will be in the office, and ensure that full-timers are available in the office to supervise and mentor Techrangers, and to help us keep track of who is potentially in the building in the event of an emergency.
Locate and Open the Spreadsheet
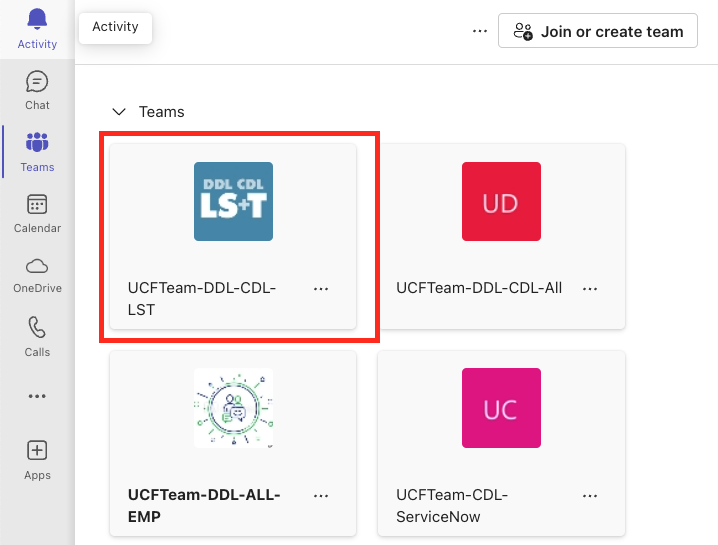
1. In Teams, go to the “UCFTeam-DDL-CDL-LST” team.
Find the LST Team
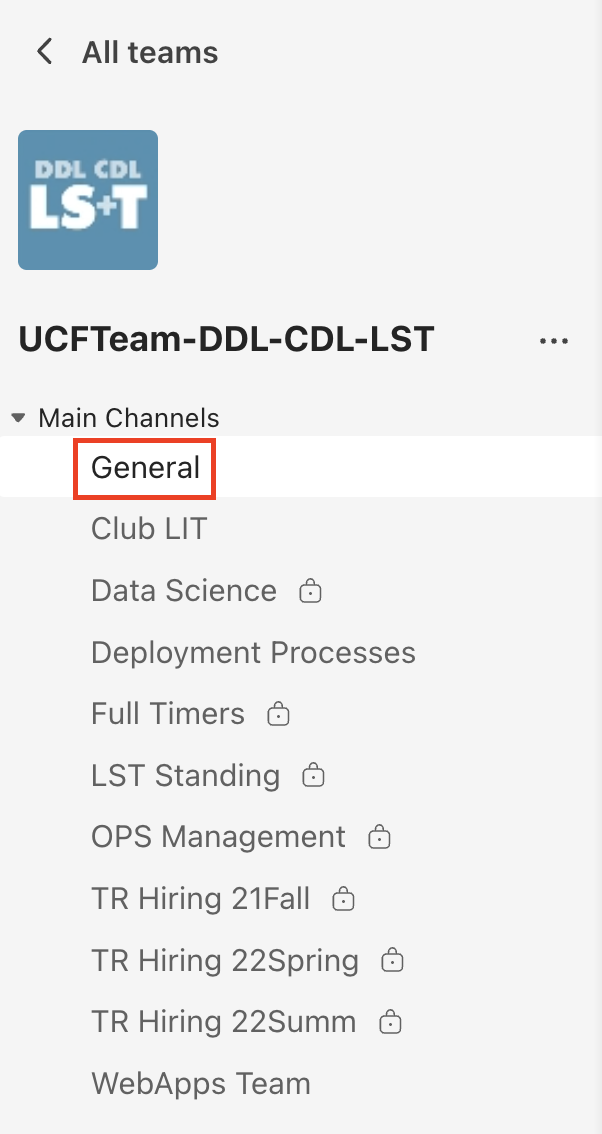
2. Select the “General” channel.
Find the General Channel
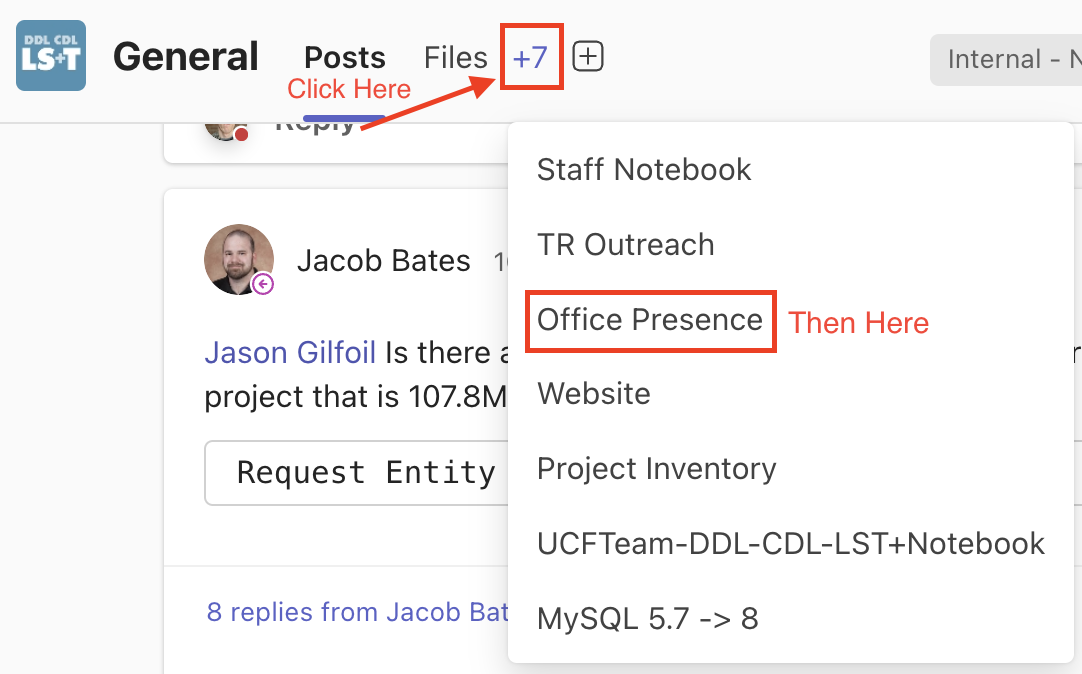
3. Go to the “Office Presence” tab.
Find the Spreadsheet - Shortcut
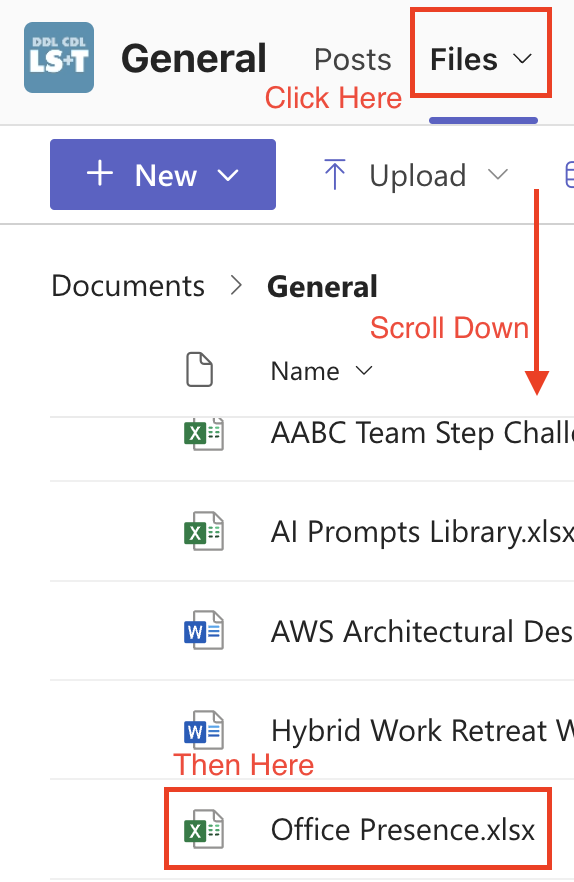
Alternatively, go to the “Files” tab and open the file called “Office Presence.xlsx”.
Find the Spreadsheet - File
Using the Spreadsheet
There are several worksheet pages in this document. The first five pages each represent a day of the work week, Monday through Friday. These pages are where you will be making changes. The other pages are only for administration and reference - do not edit them. The remaining instructions will be written assuming you are interacting with one of the five weekday pages of the spreadsheet.
Locate Your Row
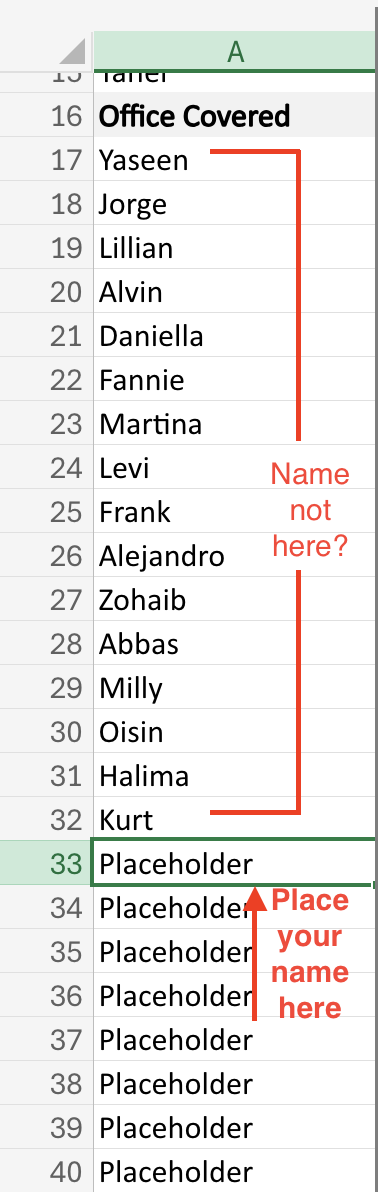
The leftmost “Staff” column contains a list of all staff at LS&T. There is also a row titled “Office Covered”. Do not edit this row. All staff above this row are full-timers, and all staff below this row are Techrangers.
Look for your name in the “Staff” column. If it does not appear, replace the earliest ‘Placeholder’ value with your name. If it does appear, ensure it doesn’t belong to another member of LS&T before editing the row.
Add Your Name
Make sure that your name is in the same row across all five sheets representing days of the week!
Tracking Your Time
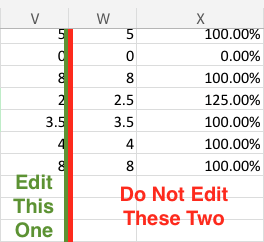
The three rightmost columns are related to your total number of hours as compared to on-site (in-office) hours. “Total Hours” represents the total number of hours you work on that given day. For example, if you are a Techranger who works a three hour block in the morning and a two and a half hour block in the afternoon, you should edit your row in the “Total Hours” column to the number 5.5. On days you are not working, set “Total Hours” to 0. The “On-Site Hours” and “% Hours On-Site” columns are calculated automatically. Do not edit them.
Indicating Total Hours
Along the top of each weekday’s page are 30-minute time blocks listed by their start time. For example, the column labeled “5:30” represents the period from 5:30pm to 6pm.
Thirty Minute Increments

Your In-Office Schedule
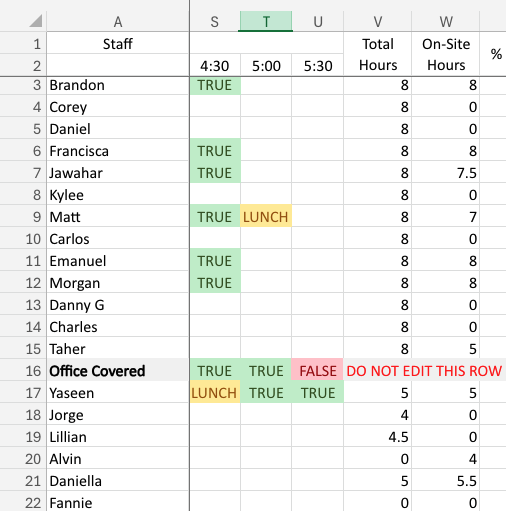
For every 30-minute period that you are working on-site, even if you only work for 5 minutes of the period, set the corresponding cell in your row to TRUE by using the built-in drop down menu (you will also see a LUNCH option - more on that in the segment below). If you are working remotely during a period, leave it blank. If you are not working during that period, leave it blank.
Indicating In-Office Times
“Lunch”
The LUNCH option indicates that you are in the office but not on the clock, as in the event that you are taking your lunch break but not going off-site. LUNCH blocks will help us ensure that we still have full-timers in the office for coverage purposes, but will not count towards your on-site hours total for a given day of the week. This option can also be used to indicate any mandatory 30-minute breaks during work blocks greater than 5 hours in length.
Indicating Breaks

Part-Timers: Repeat the above process for every week day on the respective page. When complete, verify that the values in the “On-Site Hours” and “% Hours On-Site” appear correct. Inform your supervisor and trainer when you have completed this step.
Coverage
This spreadsheet will quickly and easily indicate if a part-timer is expected to be in the office without a full-timer also being in the office for coverage purposes. In any case where a column has any cell with a value of TRUE or LUNCH in the part-timer’s area but not a corresponding cell in the full-timer’s area, the “Office Covered” row will indicate the offending time slot.
Identifying Coverage Gaps
Accuracy
This spreadsheet is intended to be represent your schedule for a typical work week, and should only be changed when you make a long-term adjustment to your schedule. Therefore, whenever you change your work schedule in Outlook, you must also change your work schedule in the Office Presence spreadsheet to match.
One-off changes to your schedule or planned short-term absences do not need to be indicated by modifying the spreadsheet.